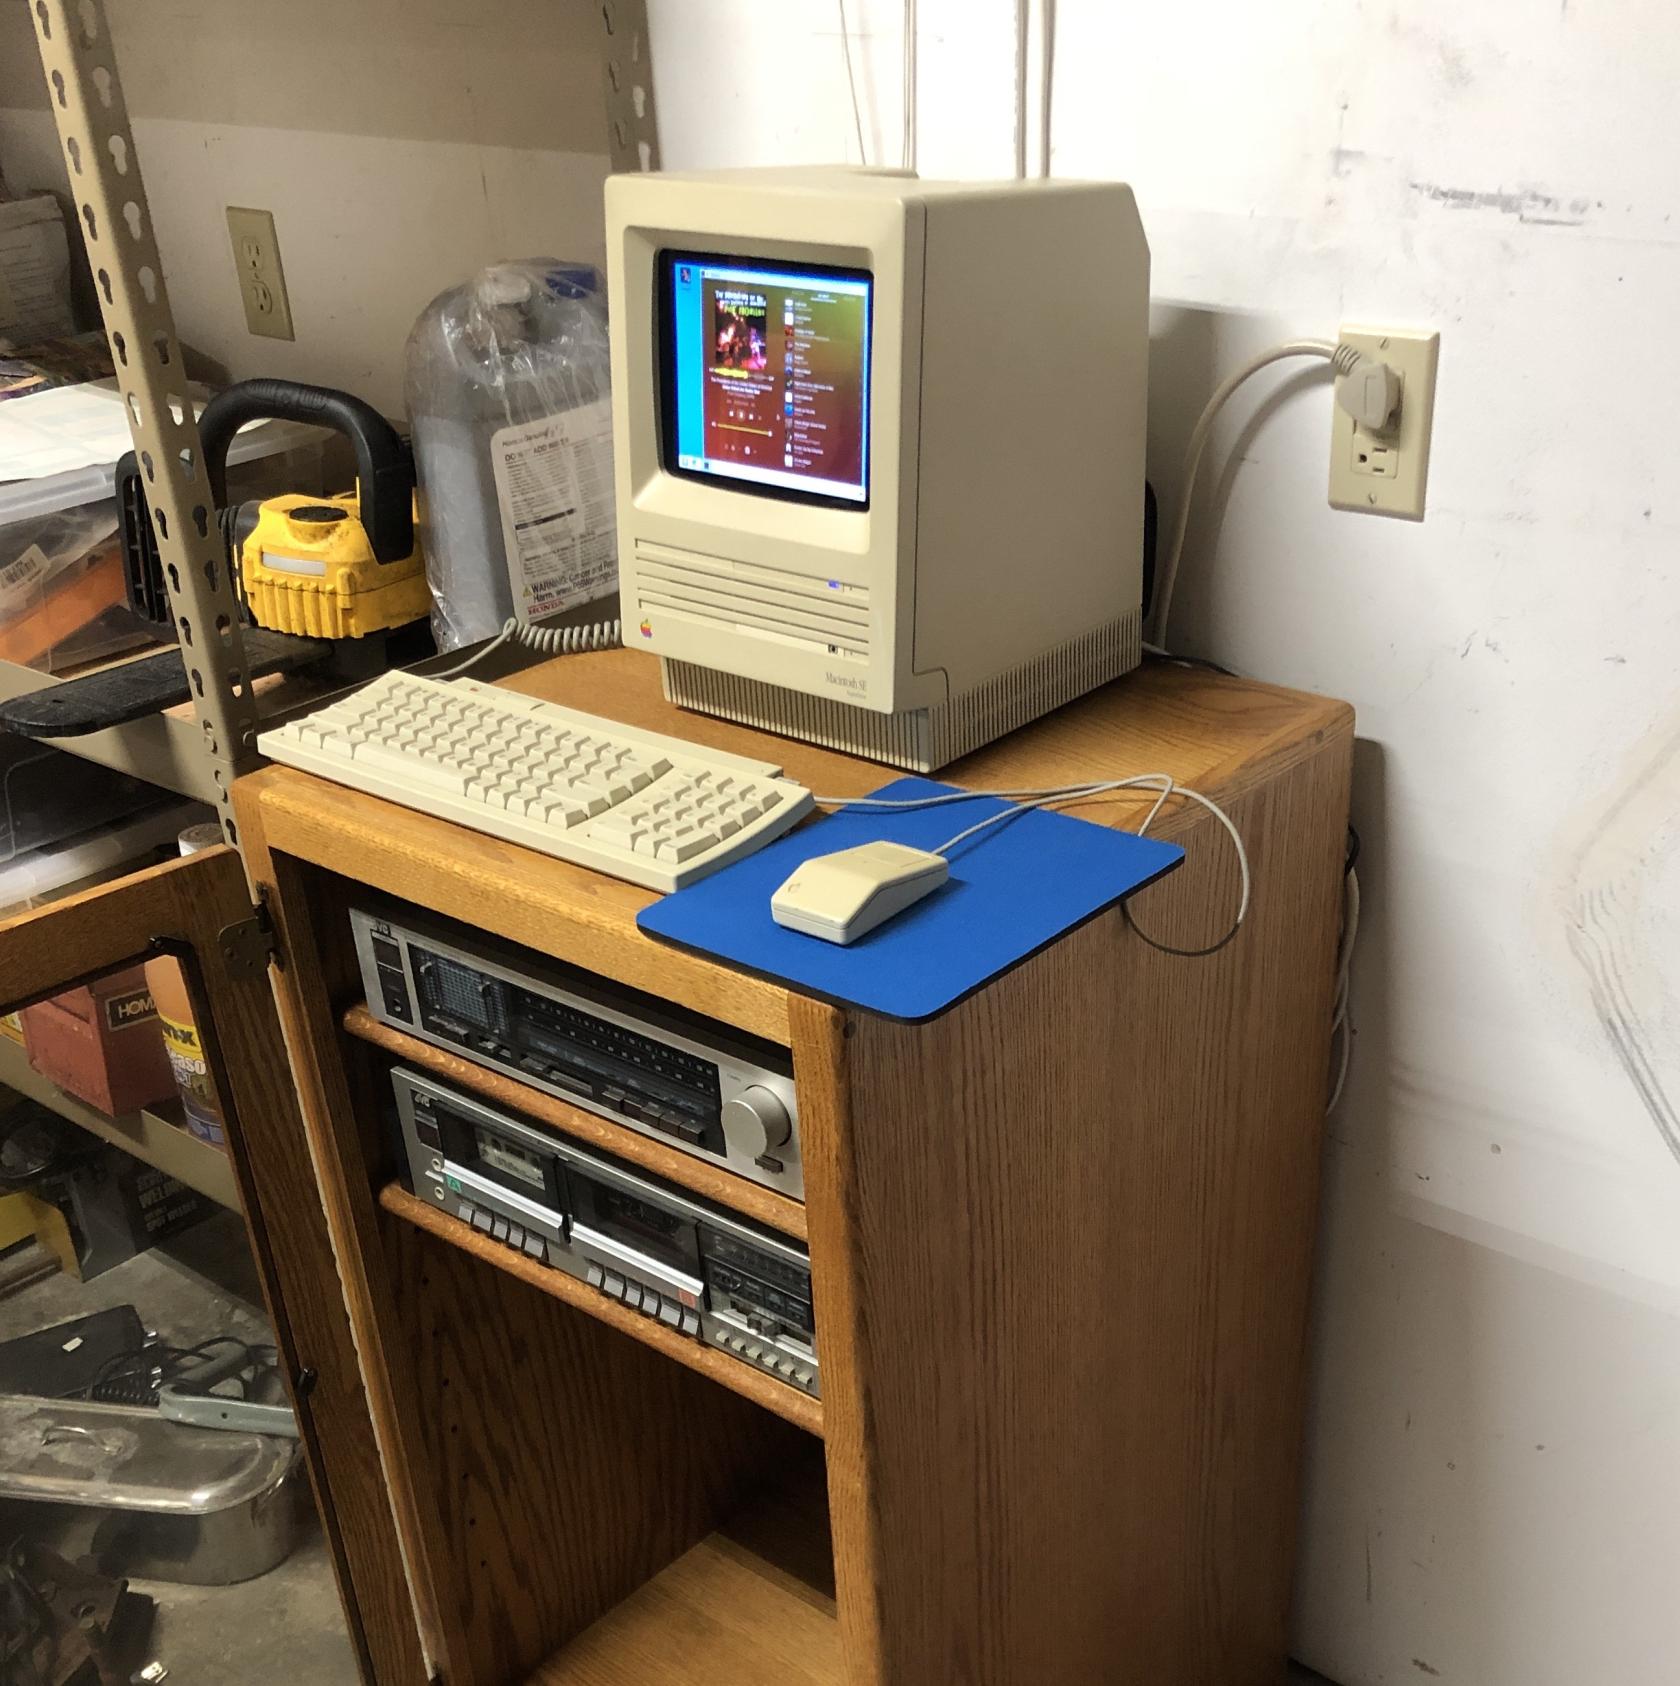
# Garage Computer
**Built a computer to use for music (PlexAmp app) in the garage.**
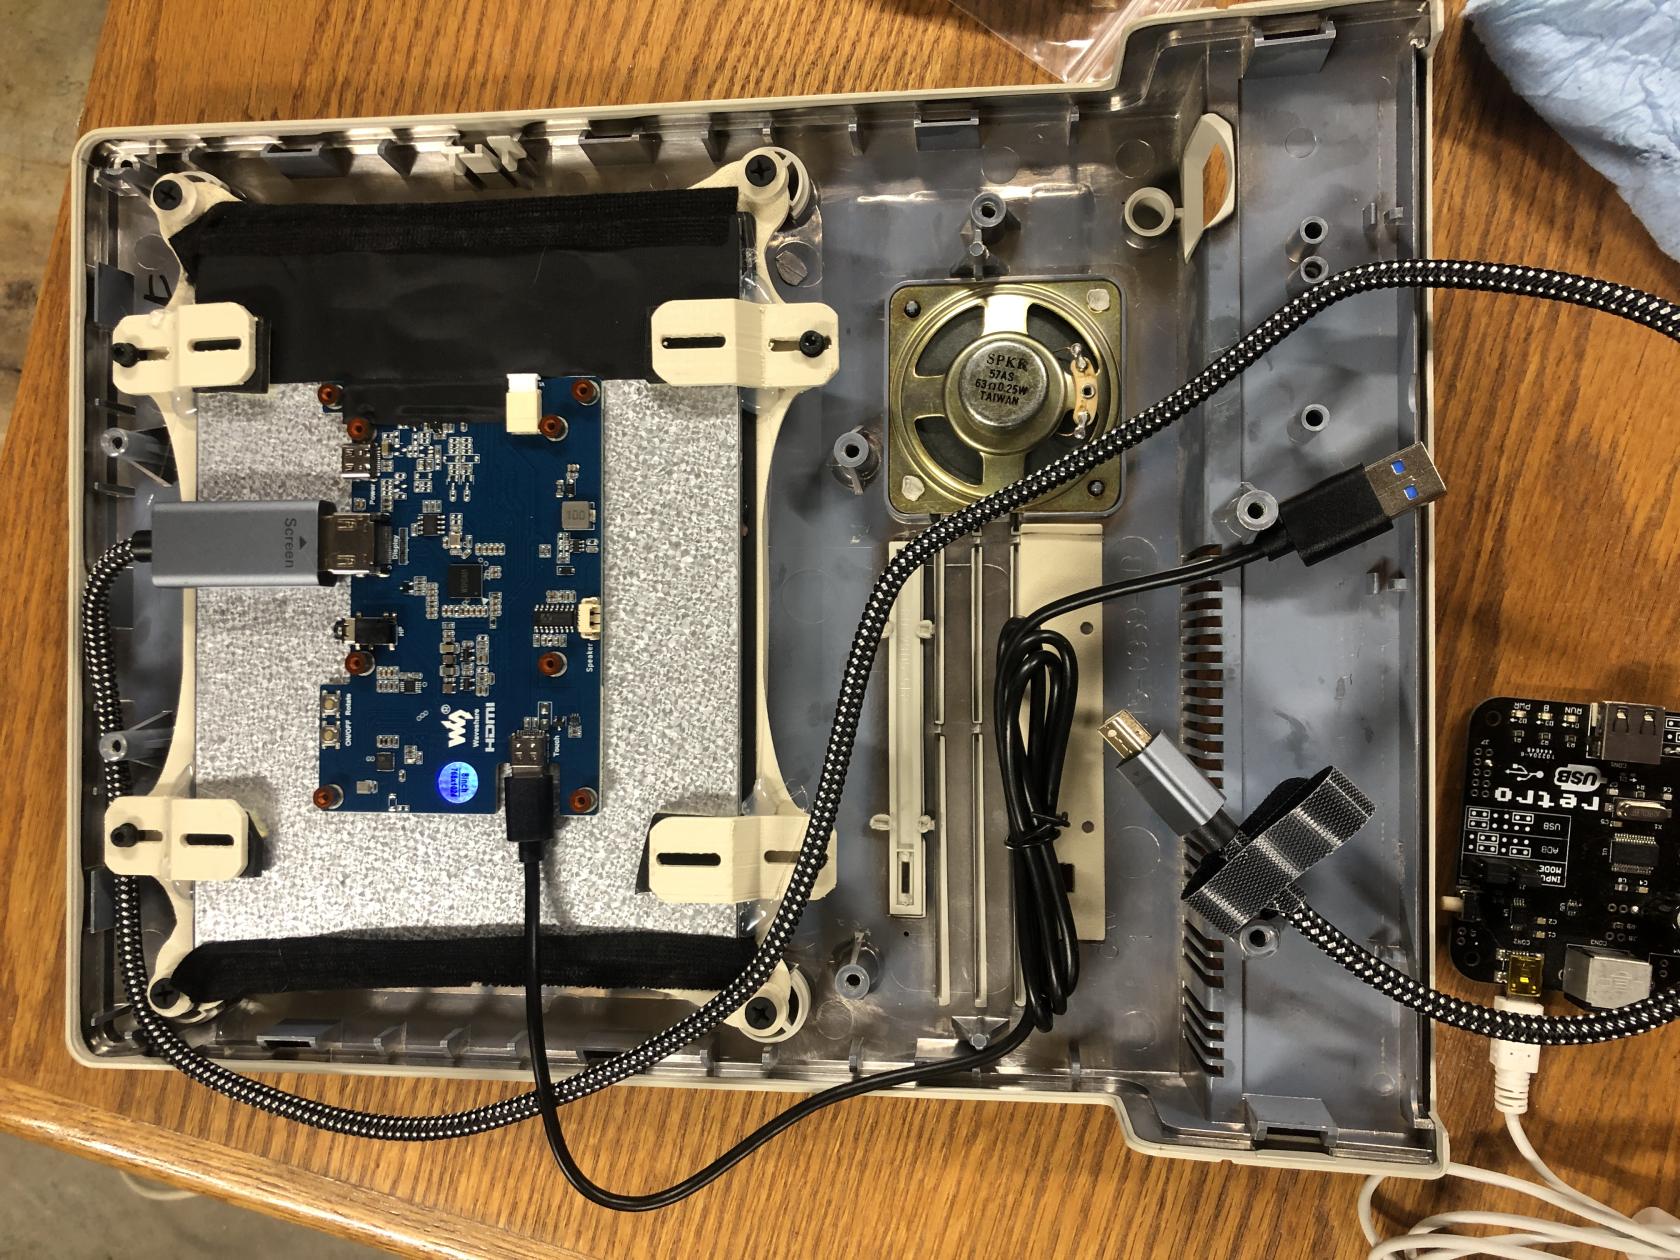
- I was gifted a 2009 Core2Duo Mac mini with 4GB of memory and an SSD.
- Installed Q4OS Linux for something lightweight that feels up-to-date and snappy on this older hardware.
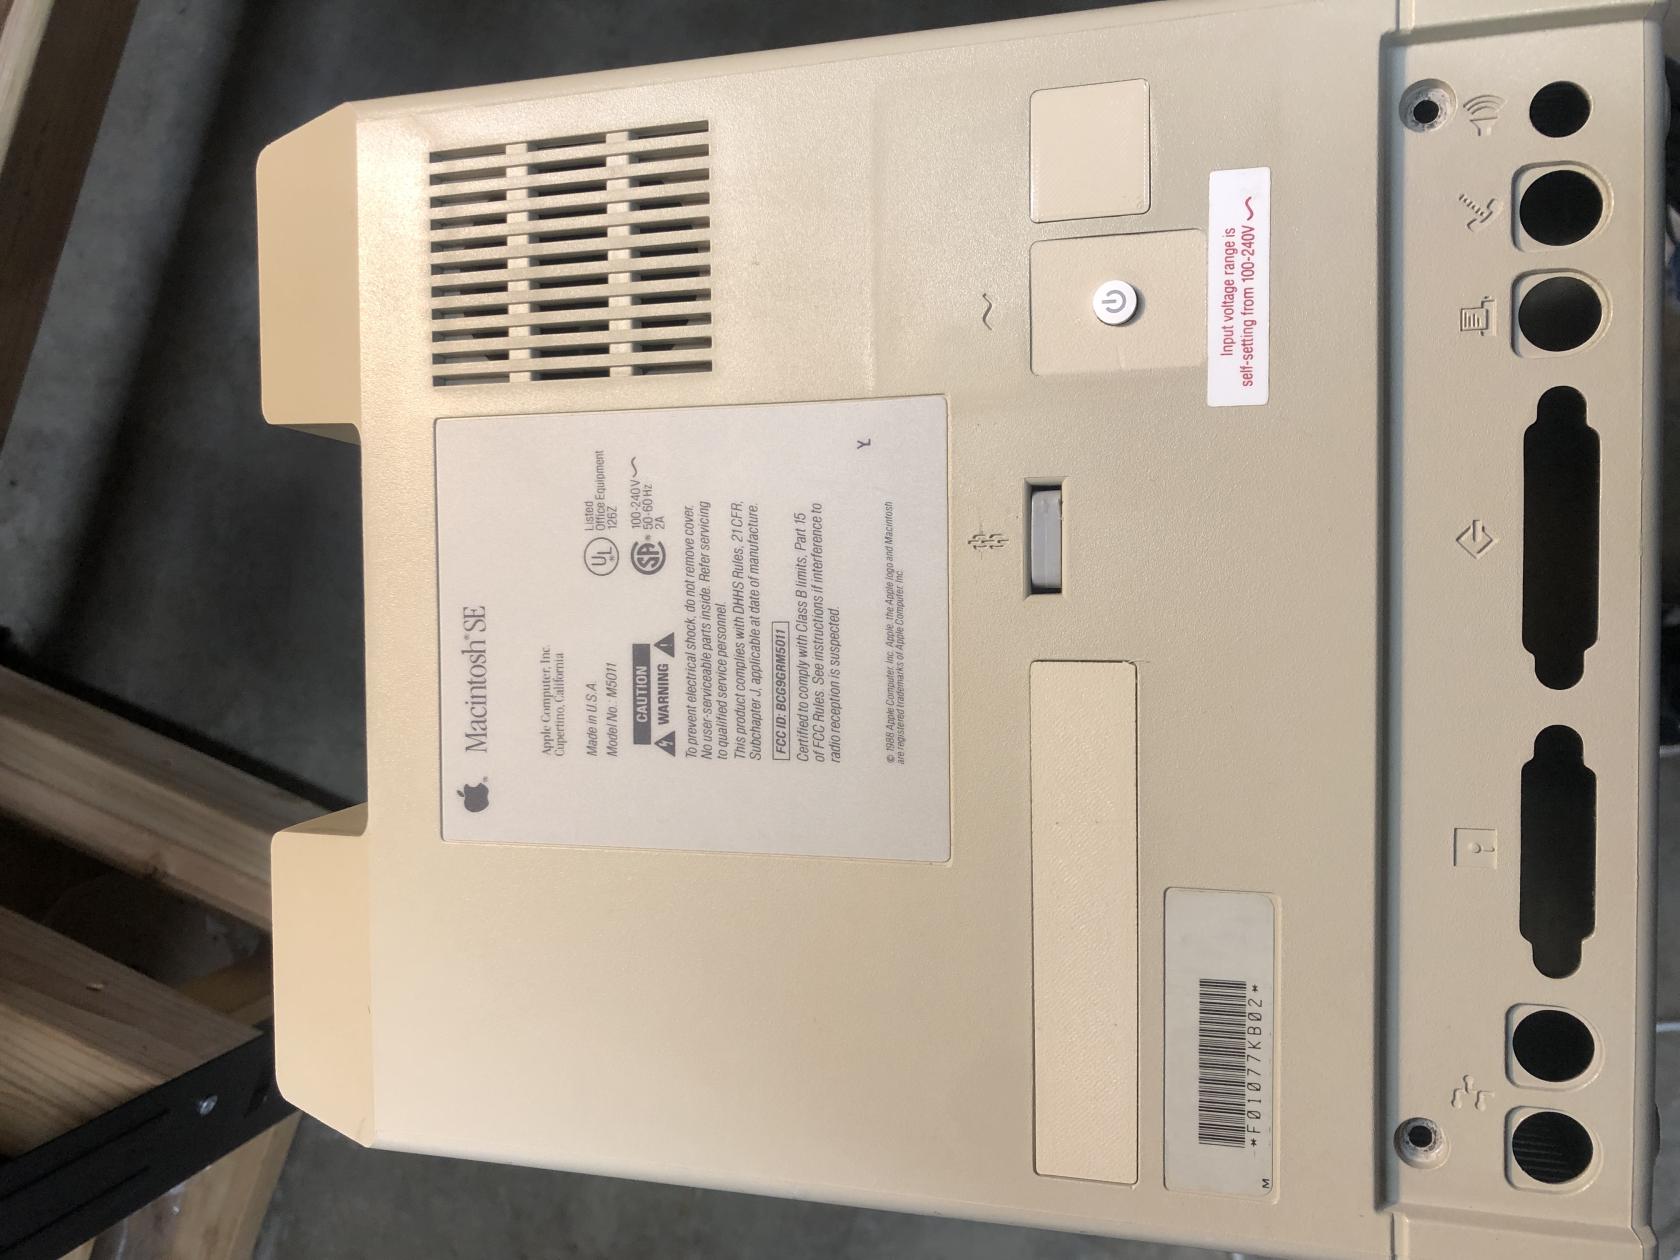
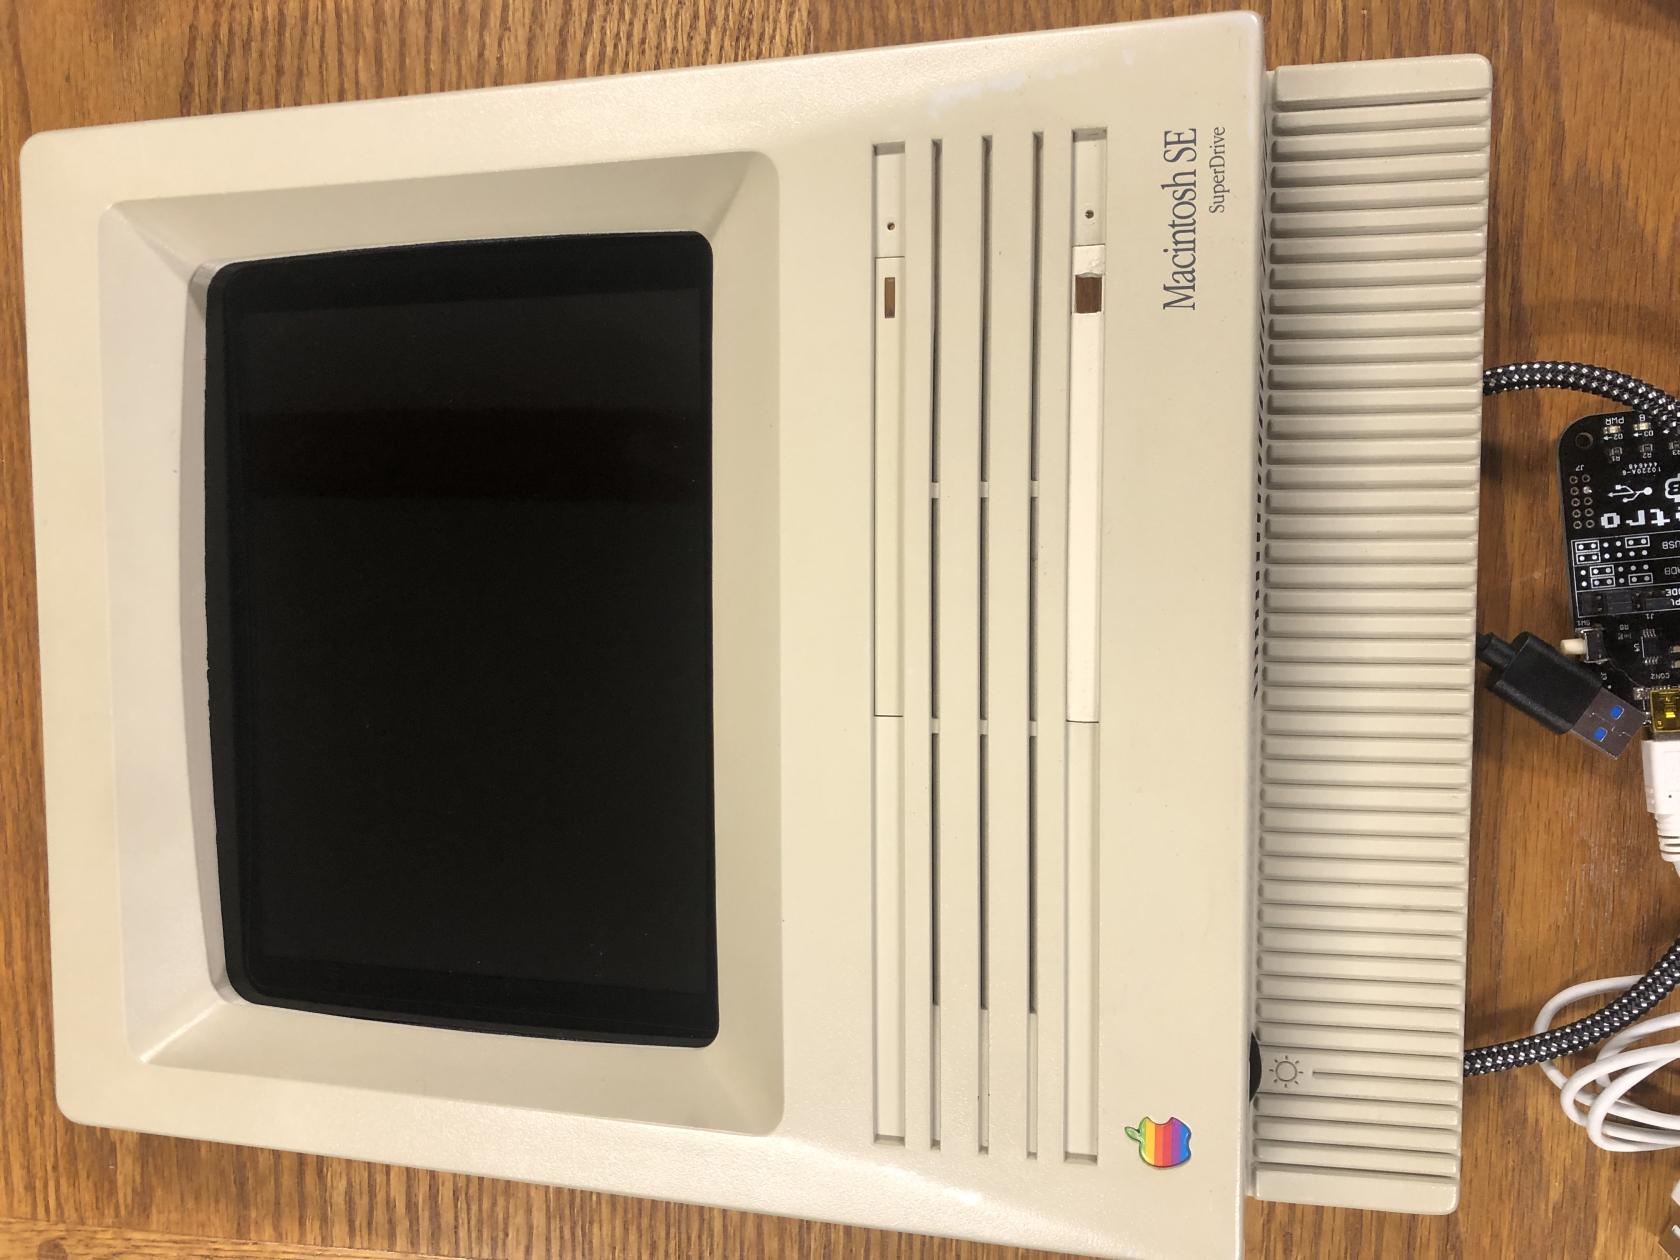
- I decided to use an empty Macintosh SE FDHD shell I had. The original computer is still in use inside a clear/transparent MacEffects case.
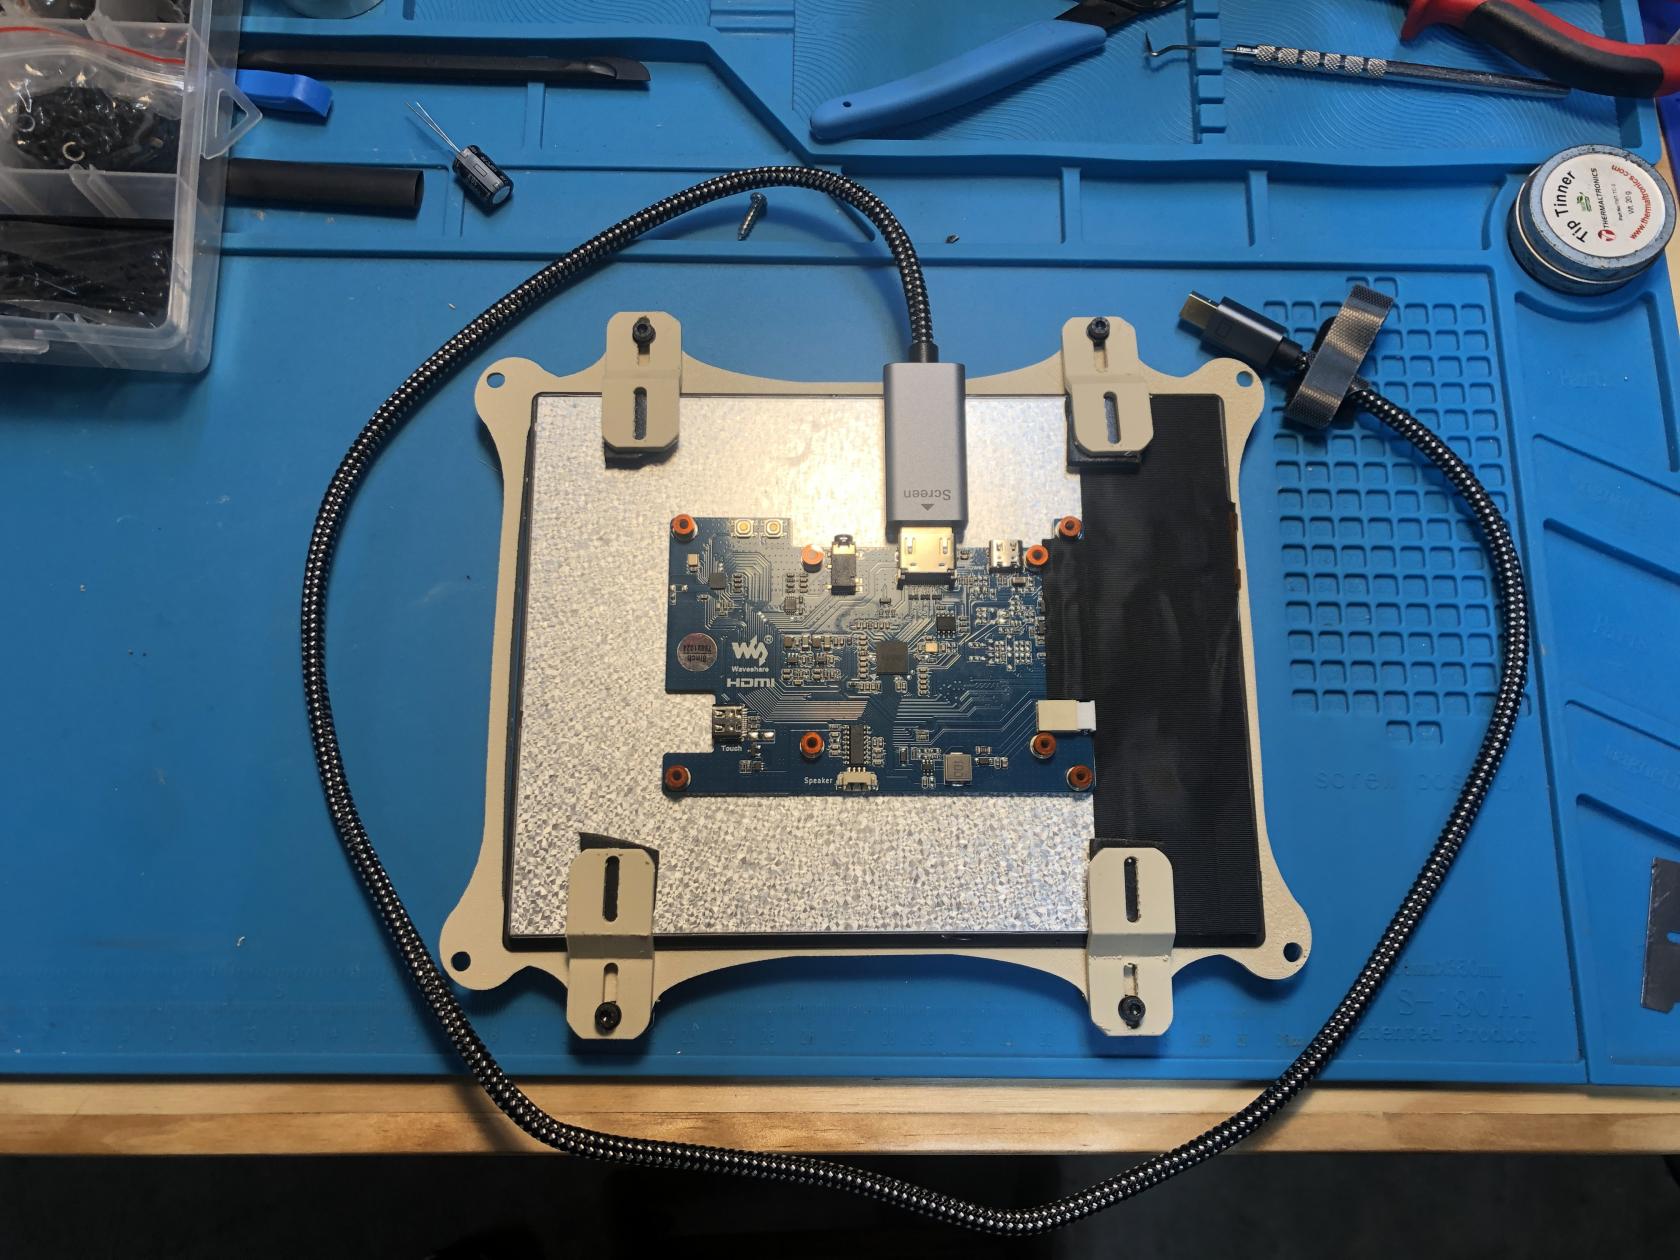
- For screen I purchased a [Waveshare](https://www.waveshare.com/8inch-768x1024-lcd.htm) 8" 768x1024 IPS touchscreen LCD.
- I printed [brackets](https://www.printables.com/model/876743-macintosh-aio-9-inch-lcd-bracket-rev-4 "Link to STL files") to mount the screen in the front of the Mac SE shell.
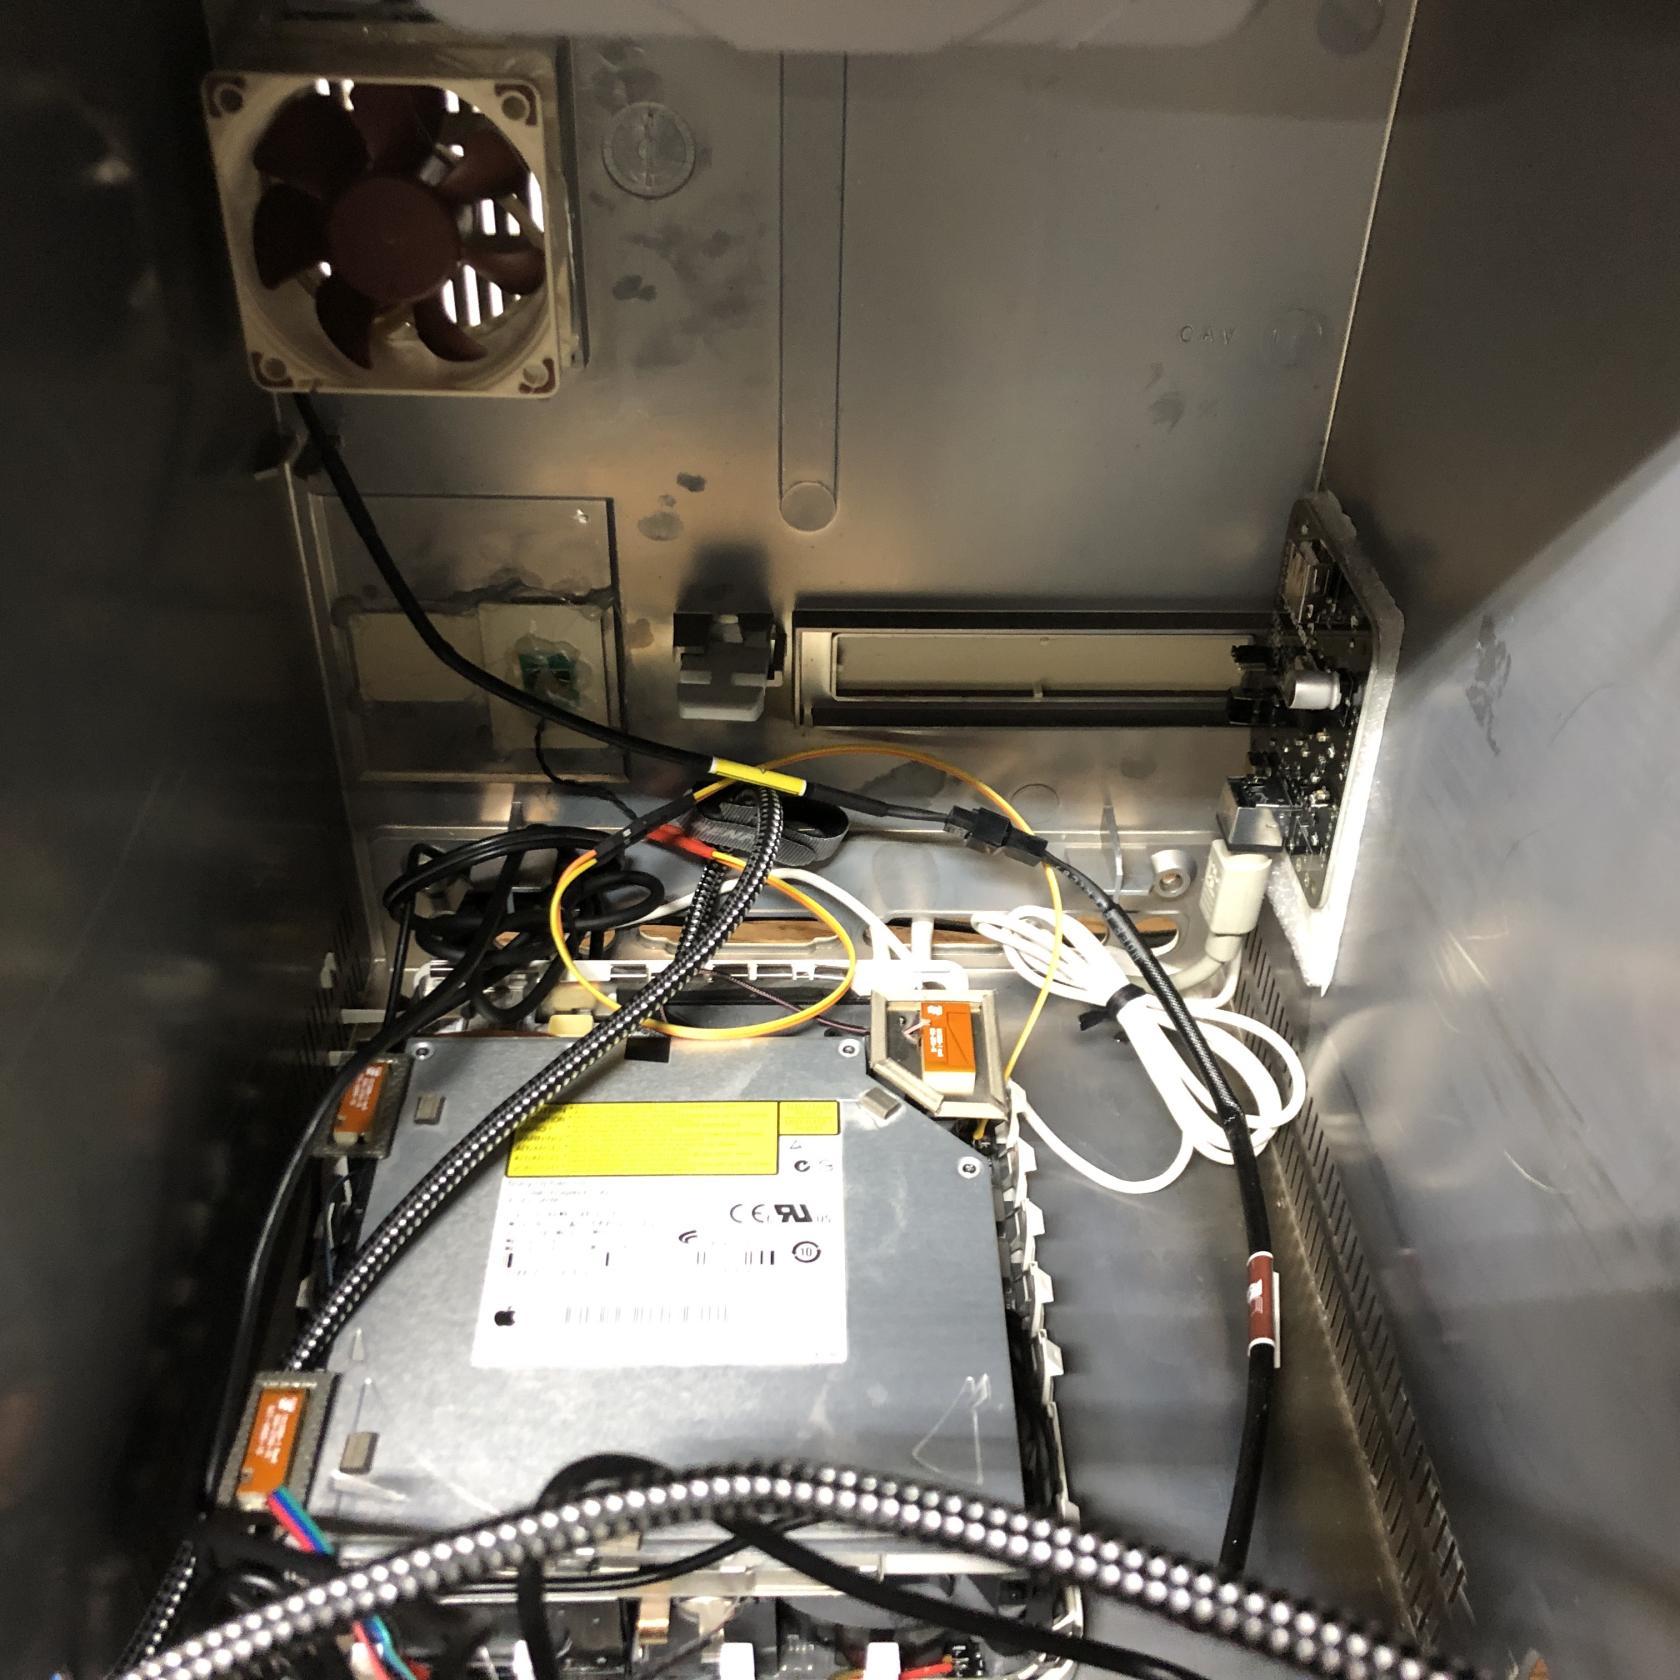
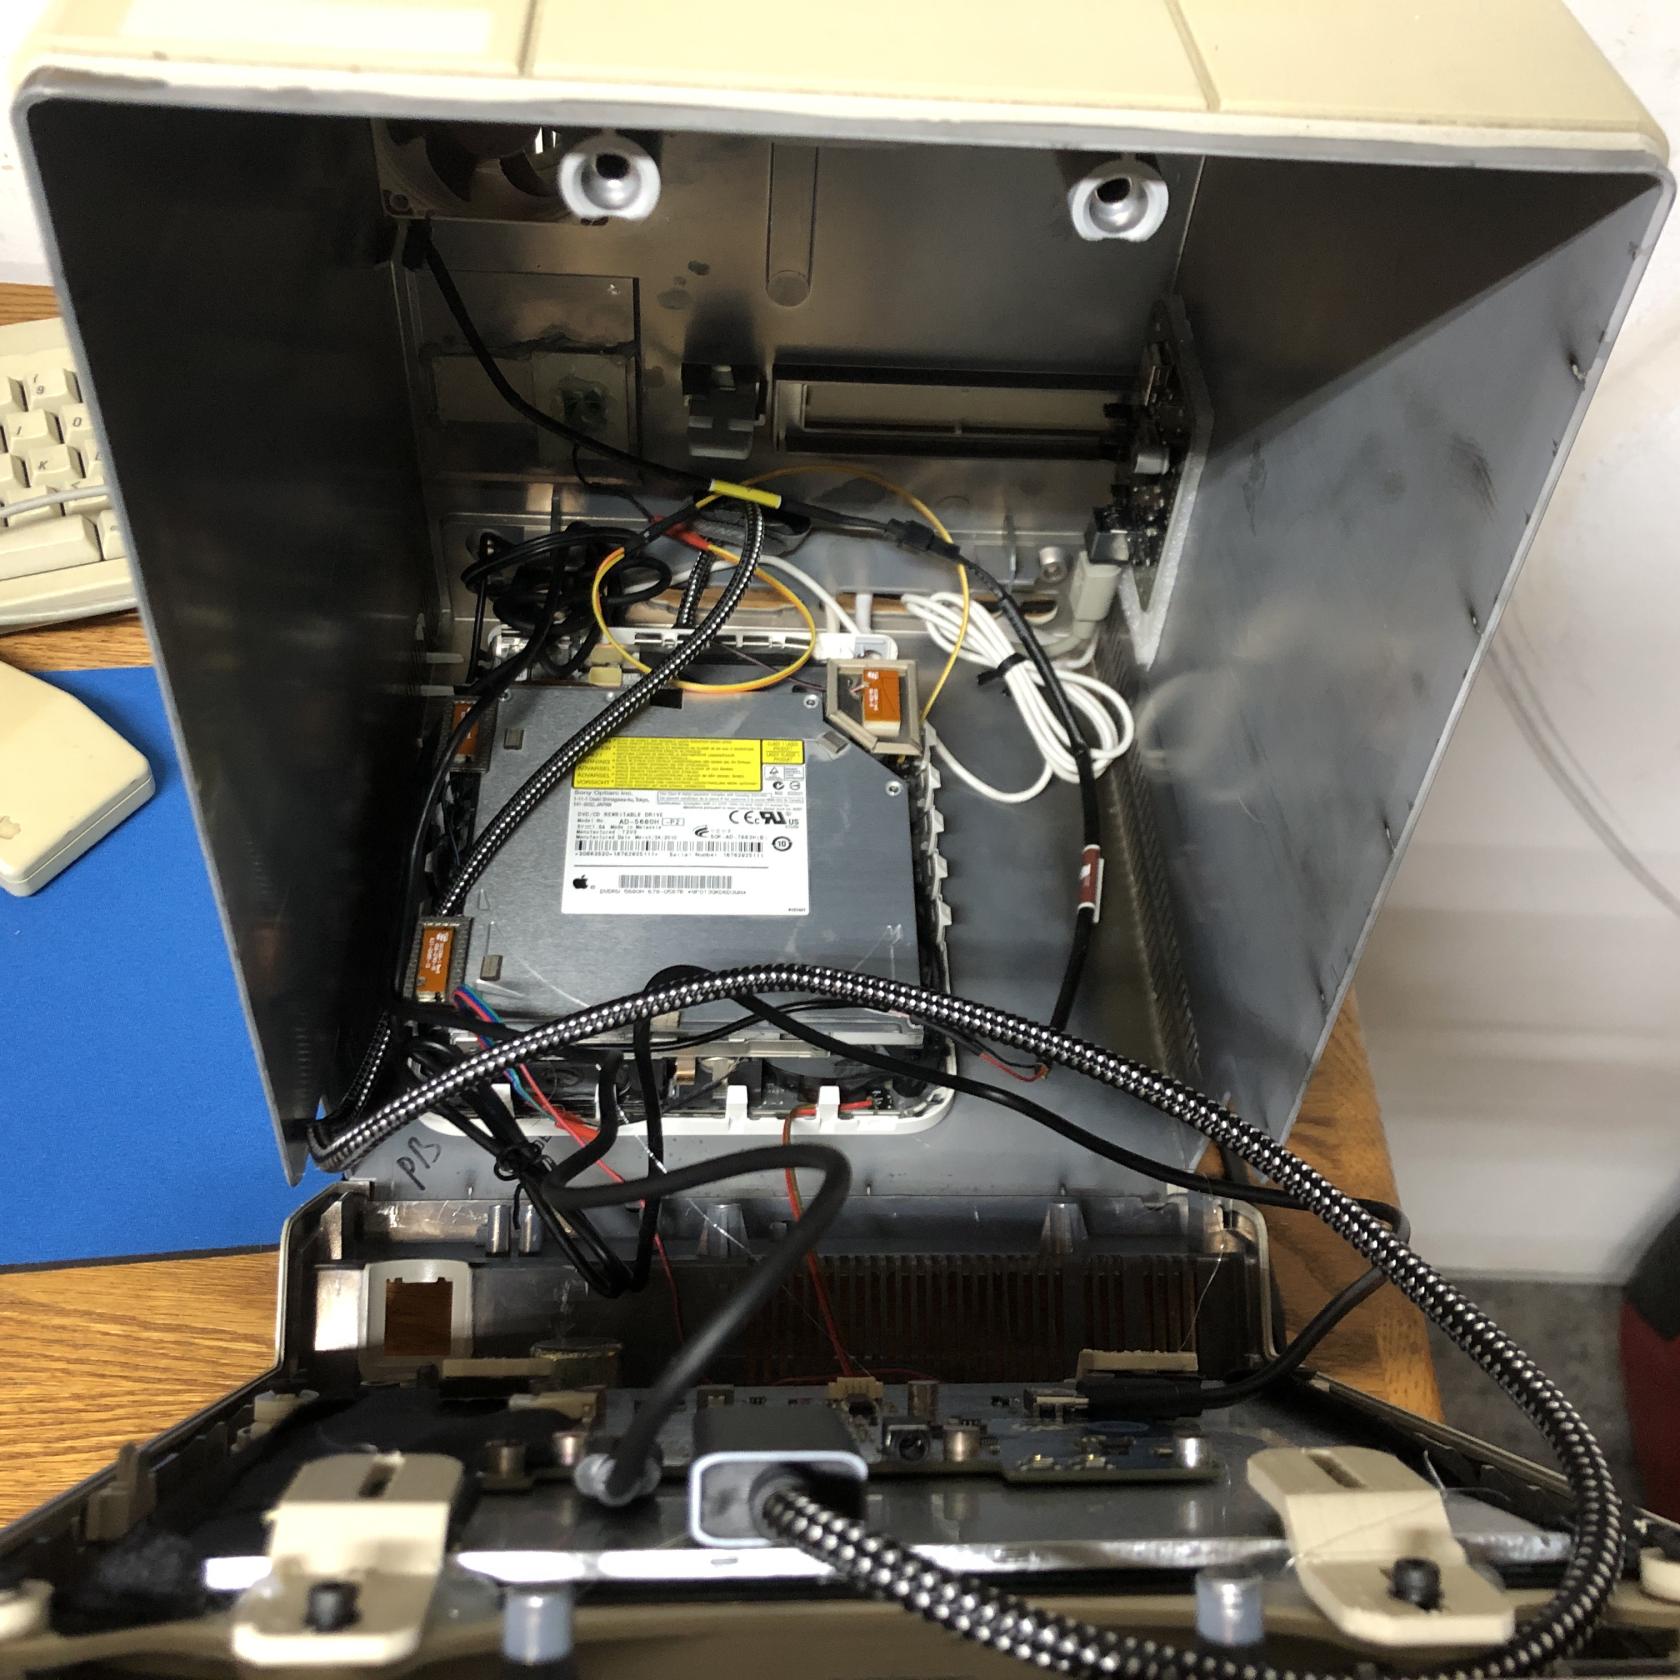
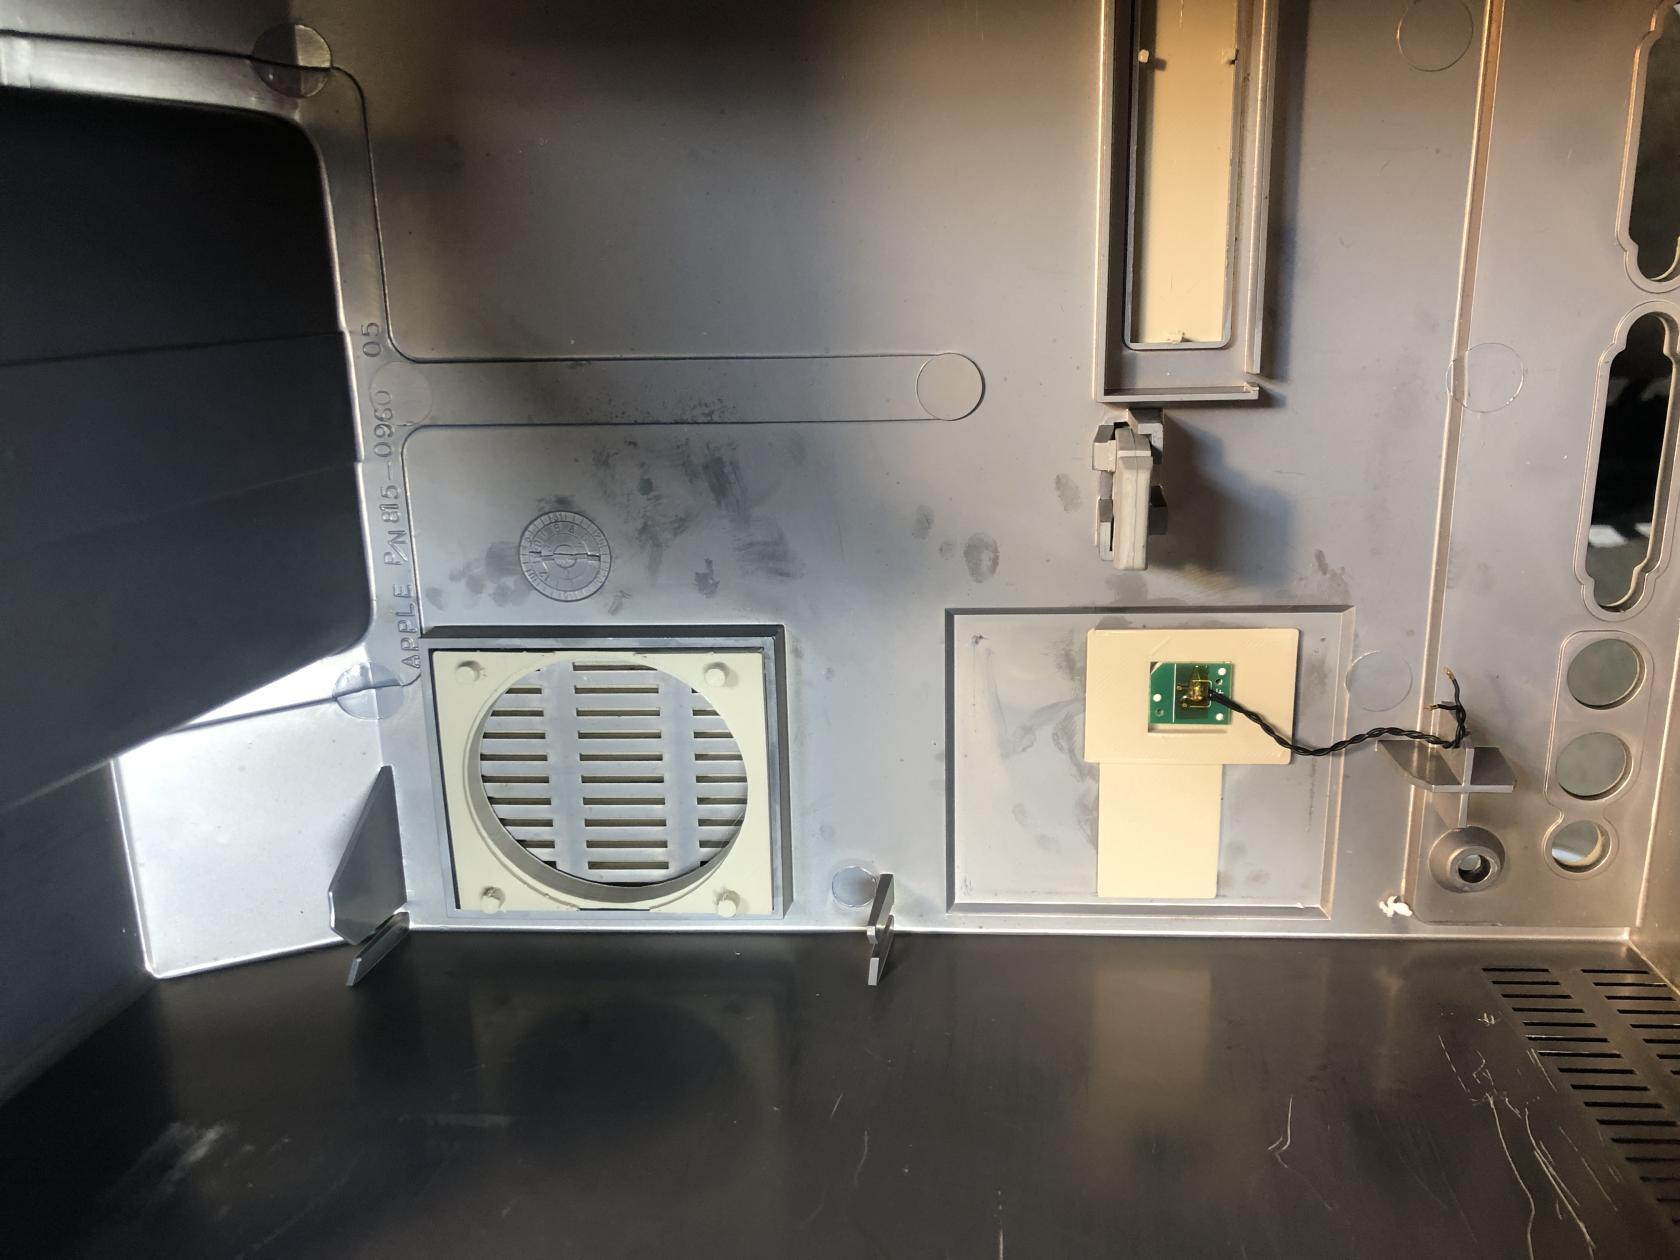
- I removed the Mac Mini upper shell and extended the power LED so it could be attached to old HDD activity hole. Added wire to move/extend the power button to the rear of the Mac SE shell.
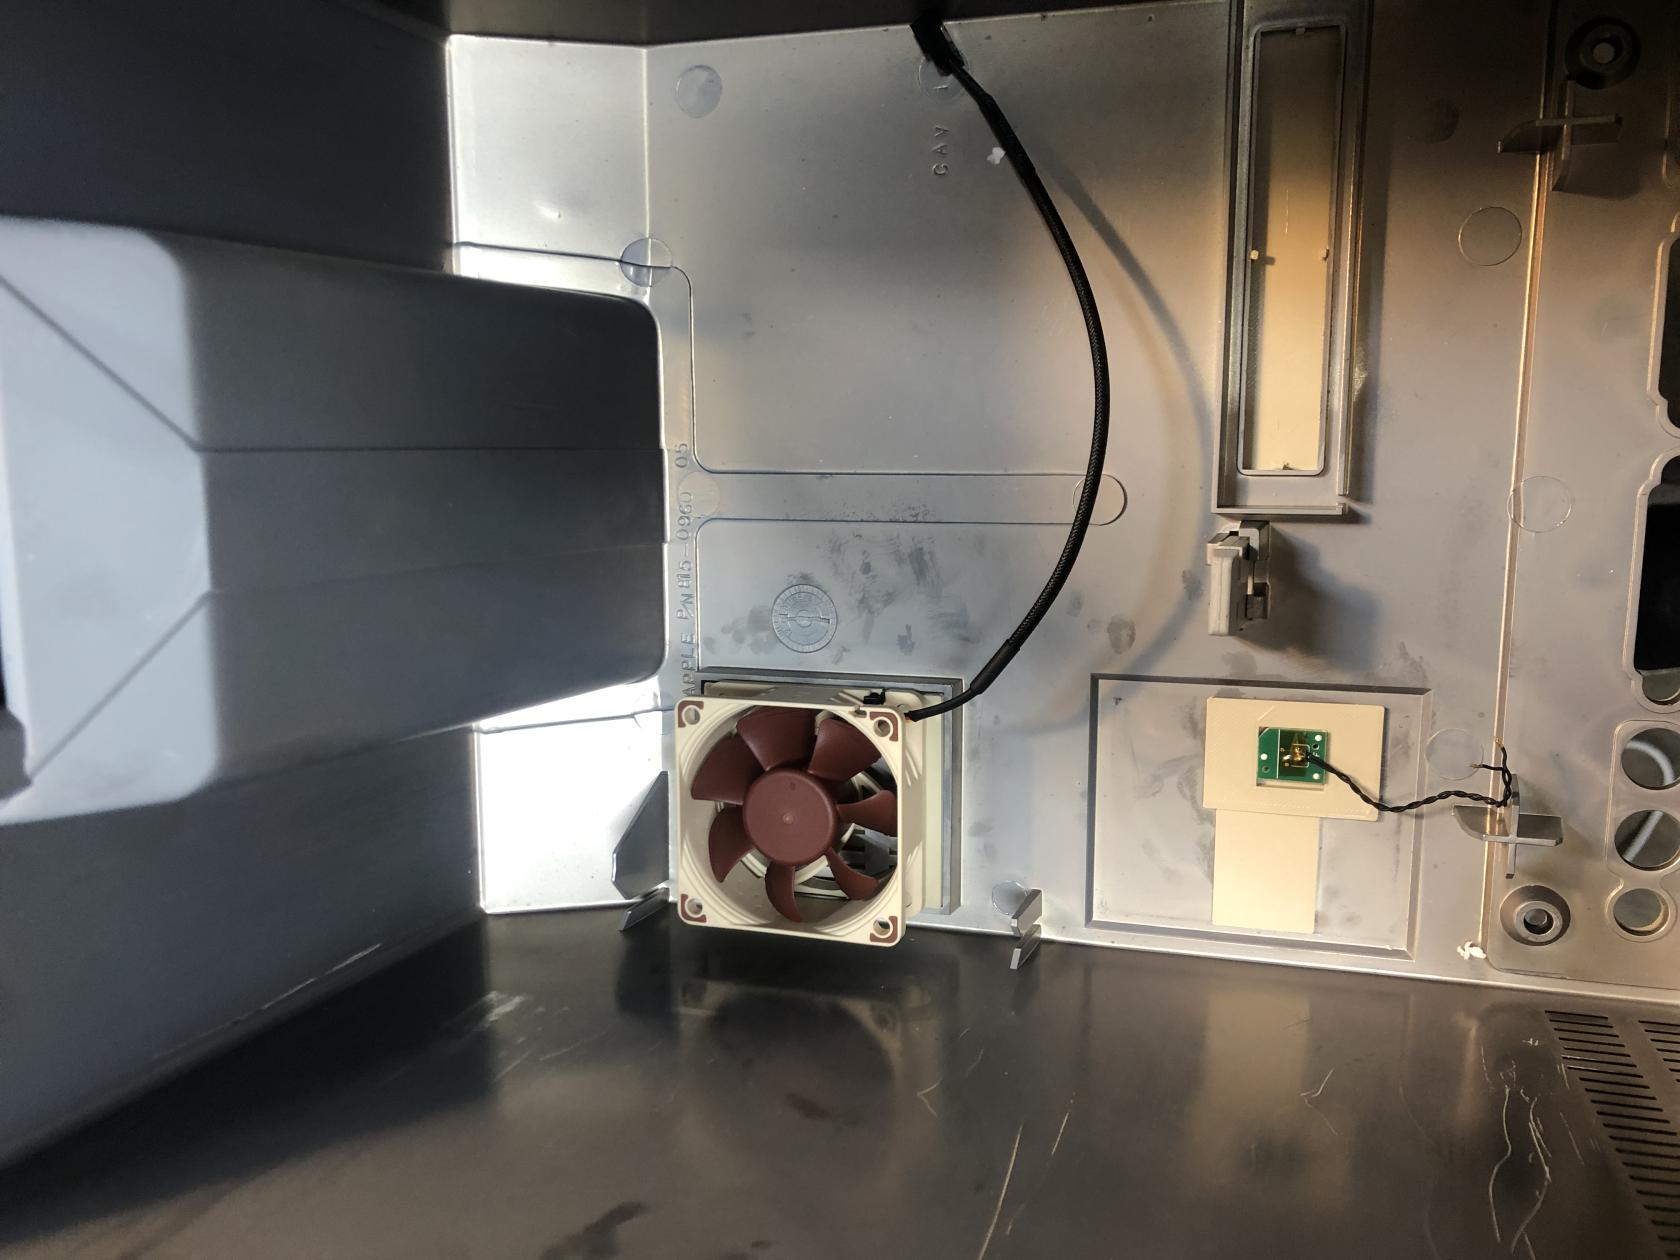
- Created some 3D designs in TinkerCAD to mount the button and fill the rear holes. Also created a mount for 60mm Noctua rear exhaust fan.
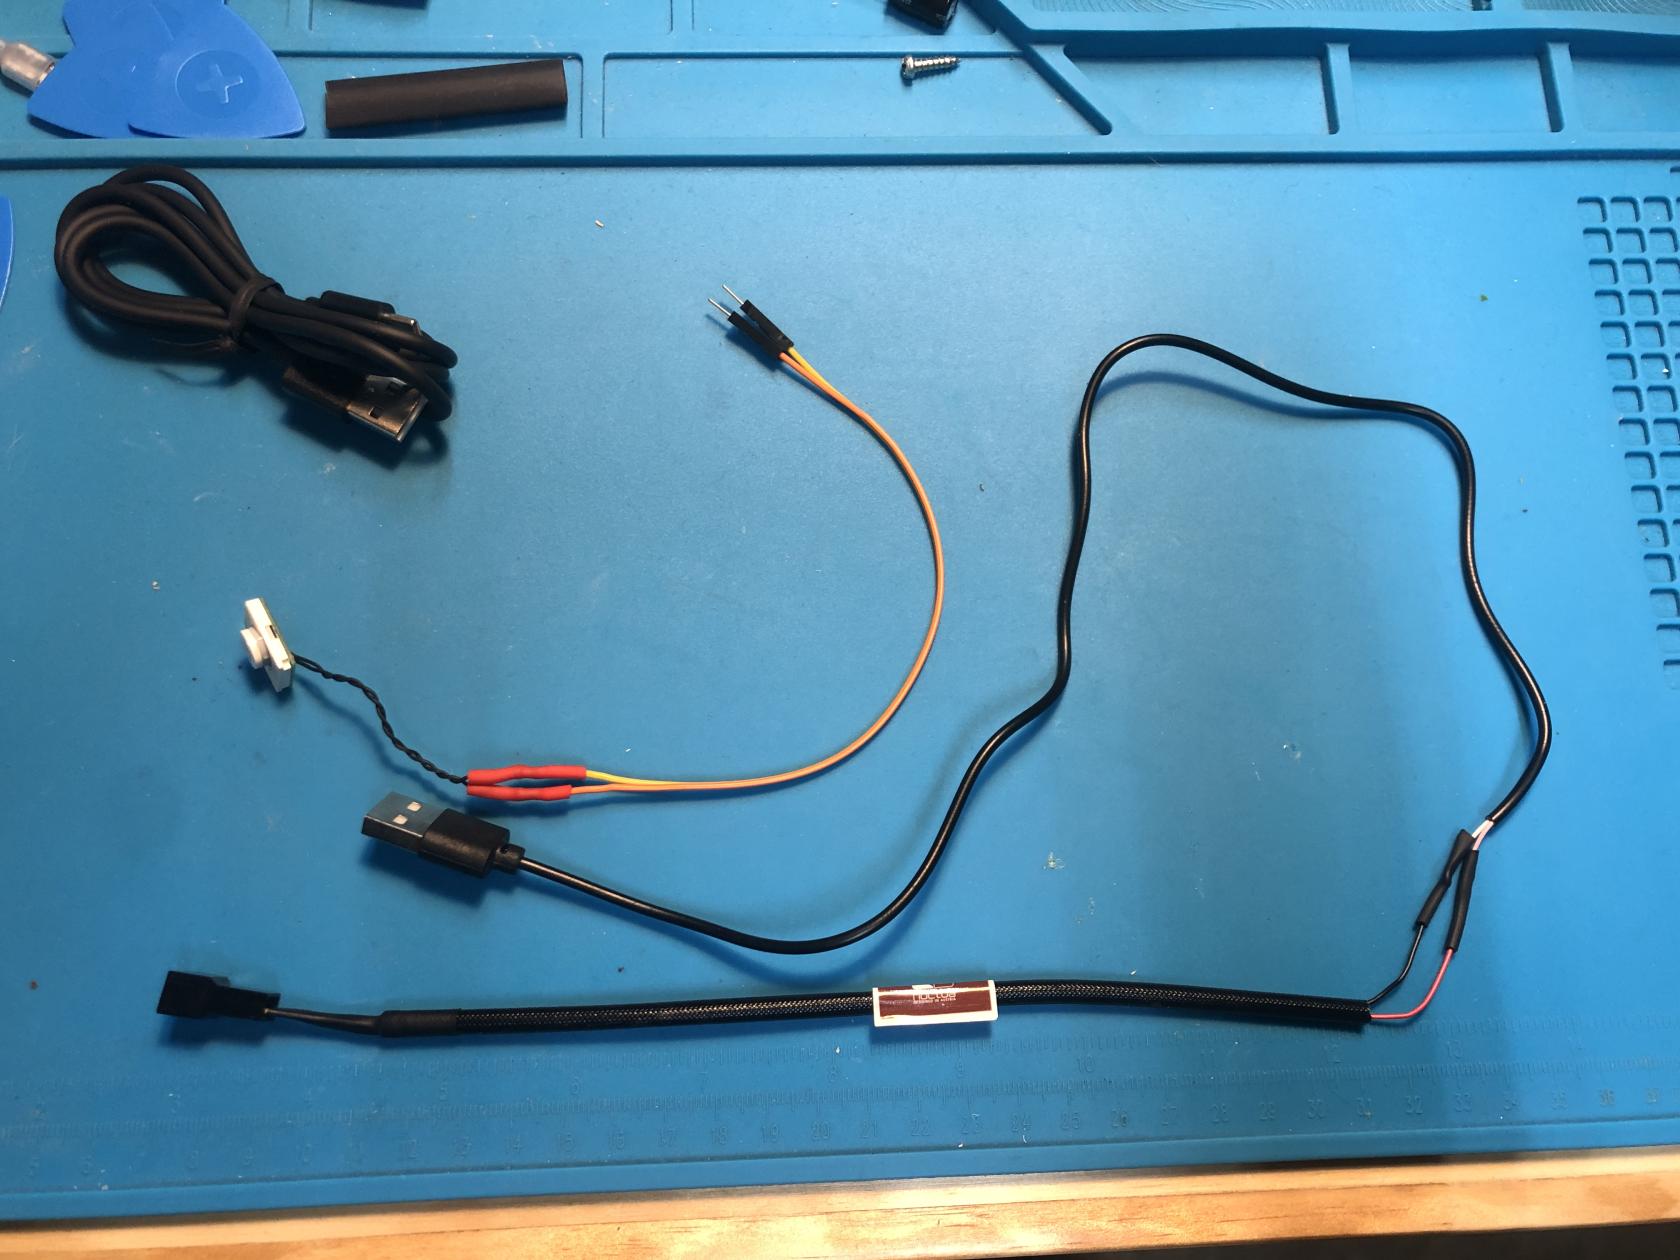
- Made the needed USB->3Pin fan header adapter.
- For keyboard and mouse. I used an original Apple ADB keyboard and mouse with a ["Retro USB" ](https://www.bigmessowires.com/2017/05/16/retro-usb-on-sale-now/ "Retro USB")adapter to convert the older input devices to USB.
[](https://aaronnewman.net/uploads/images/gallery/2026-01/scaled-1680-/UuFimg-2109.jpeg)
[](https://aaronnewman.net/uploads/images/gallery/2026-01/scaled-1680-/rVnimg-2108.jpeg)
[](https://aaronnewman.net/uploads/images/gallery/2026-01/scaled-1680-/img-2106.jpeg)
[](https://aaronnewman.net/uploads/images/gallery/2026-01/scaled-1680-/img-2107.jpeg)
[](https://aaronnewman.net/uploads/images/gallery/2026-01/scaled-1680-/img-2093.JPG)
[](https://aaronnewman.net/uploads/images/gallery/2026-01/scaled-1680-/img-2084.JPG)
[](https://aaronnewman.net/uploads/images/gallery/2026-01/scaled-1680-/img-2086.JPG)
[](https://aaronnewman.net/uploads/images/gallery/2026-01/scaled-1680-/img-2088.JPG)
[](https://aaronnewman.net/uploads/images/gallery/2026-01/scaled-1680-/img-2085.JPG)
[](https://aaronnewman.net/uploads/images/gallery/2026-01/scaled-1680-/img-2090.JPG)
[](https://aaronnewman.net/uploads/images/gallery/2026-01/scaled-1680-/img-2091.JPG)
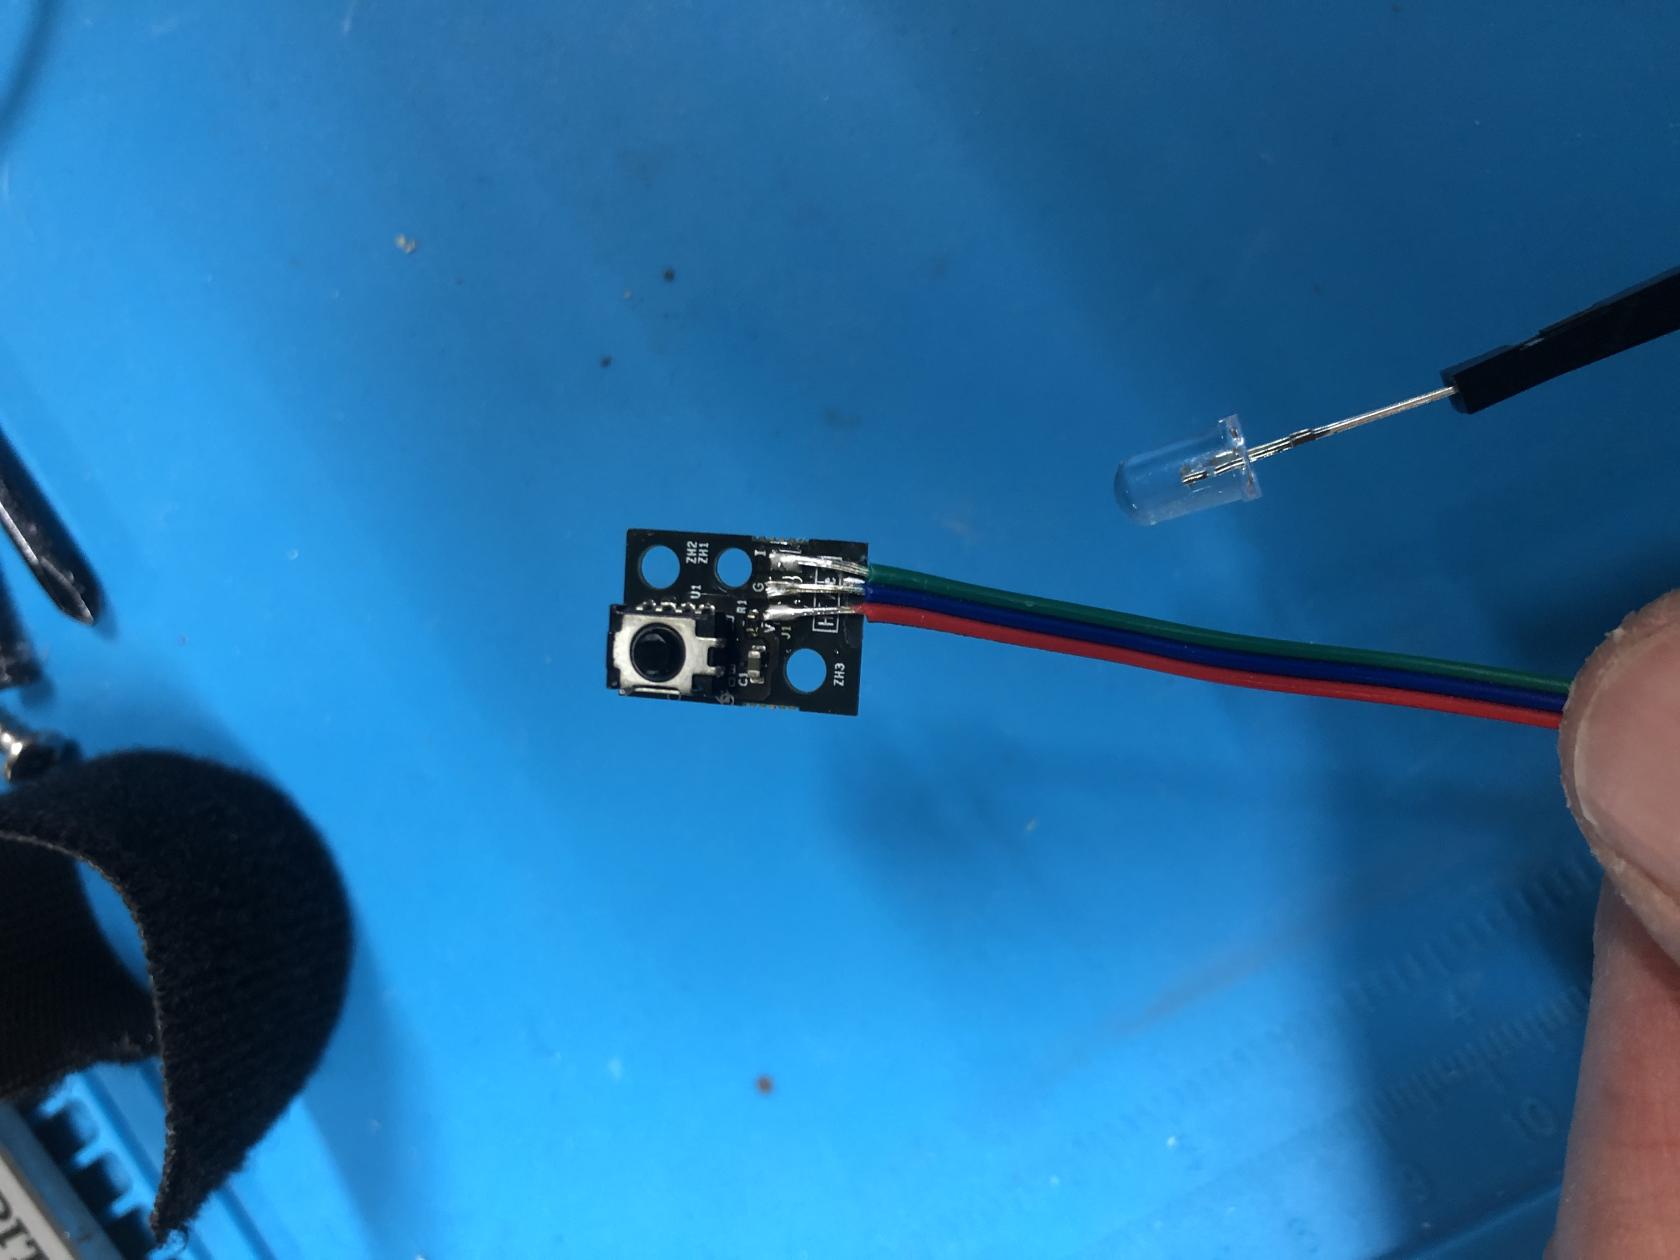
Above you can see the floppy insert I made to mount the IR remote receiver.
[](https://aaronnewman.net/uploads/images/gallery/2026-01/scaled-1680-/img-2092.JPG)
Above is the extended IR module with new longer wires.
[](https://aaronnewman.net/uploads/images/gallery/2026-01/scaled-1680-/img-2089.JPG)
Above are the extended power button and USB fan power cable.